


Updated 2021
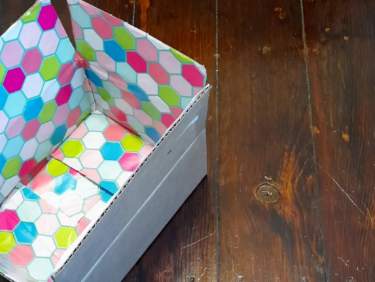
It is crazy to think that John’s been home for just over six months and a week (not that I’m counting)! I haven’t made a care package for more than half a year… until last week. I created a care package for some friends who are currently overseas– I got to break out all of my care package stuff from last year. One of my favorite ways to decorate a box is to use this gift-wrapping idea. It is so much easier than cutting down scrapbook paper– and it’s mess-free too!
So often I hear from military spouses and significant others that they don’t think they’re crafty or artistic enough to create a themed care package. If that’s how you feel– or if you just don’t want to spend a lot of time on an intricate care package– wrapping the inside of a box can be a really nice way to decorate and add a little bit of pizazz.
You can also use this gift-wrapping trick for boxes that are not care packages. You can wrap the inside of a rectangular or square box while you’re wrapping presents. It makes it just a little special (and surprising, honestly).
Here’s my easy way to do it (and have it looking fab for your gift recipient)!
You’ll Need
- Scissors (Exacto blade or pen knife might be helpful as well)
- Elmer’s Glue or double-sided tape (washi tape or other decorative tapes won’t be helpful here)
- Cardboard box
- A roll of decorated paper or plain paper, depending on the occasion (wrapping paper or craft paper)
- Packing tape
Gift wrapping your care package: a step-by-step tutorial
1. Take the box apart. Literally. If you’re using a USPS Priority Box (which are free at your local post office), there is a tab glued to the inside of the box. Pull it apart, and the box will fall open. Once your box is open, lay it flat on wrapping paper to measure how much you need. It will be helpful to line one side of the opened box at the edge of the wrapping paper or corner of the wrapping paper (if your paper has a straight edge on two sides). Make sure that you have enough paper to cover the entirety of the flattened box.
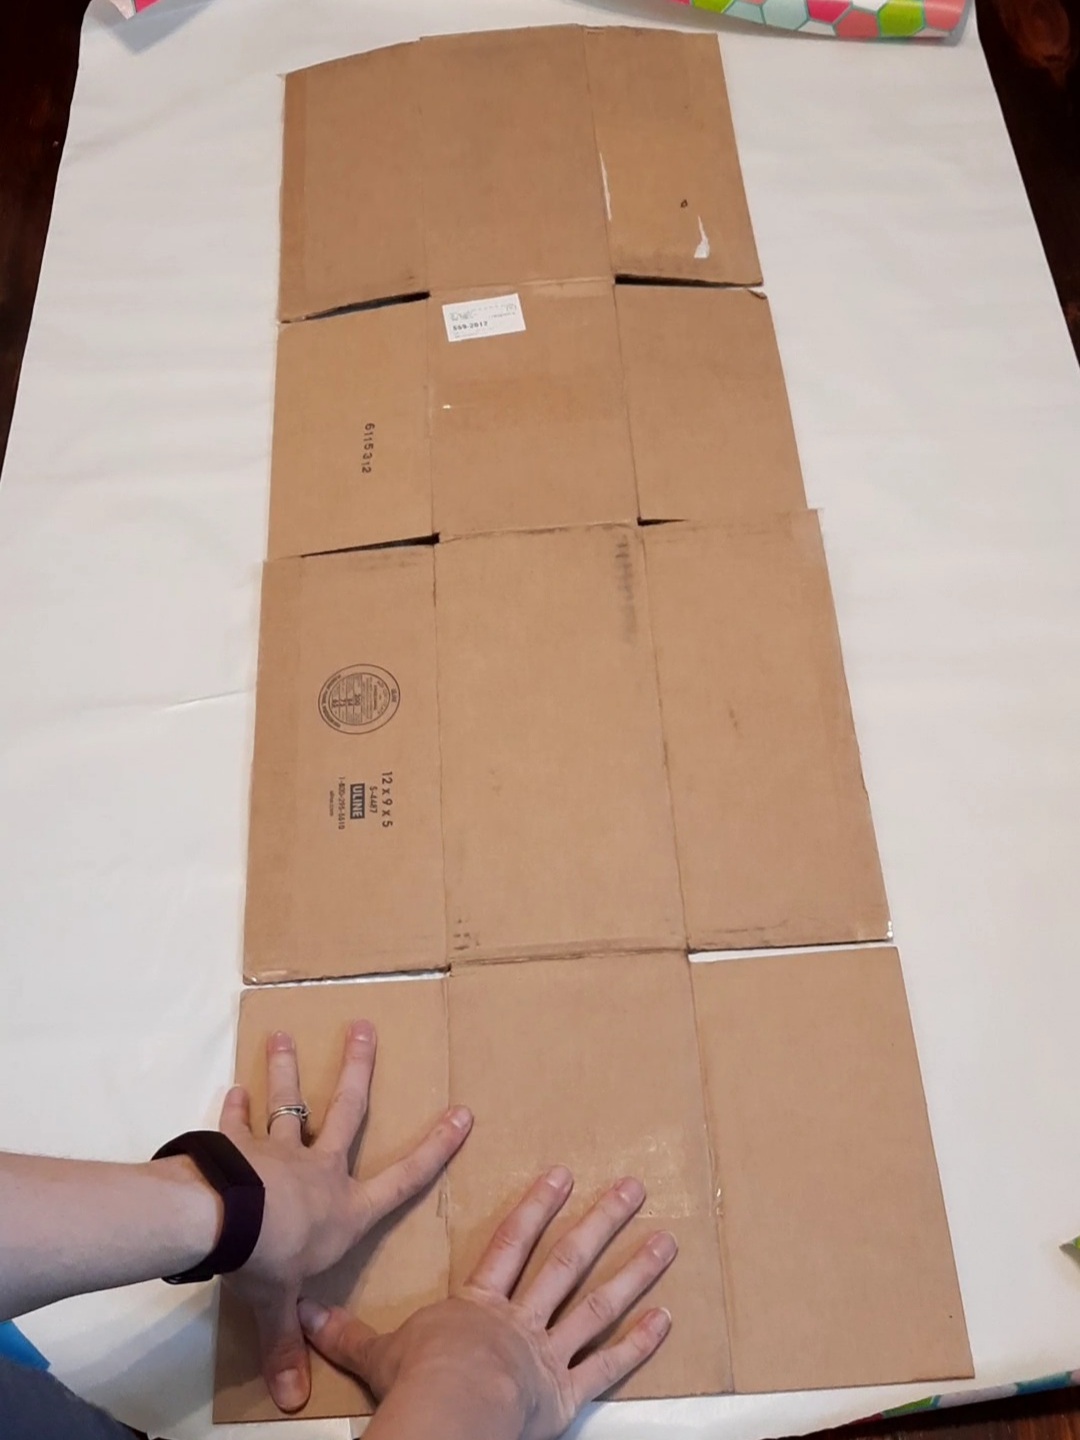
2. On the inside of the box, spread your Elmer’s Glue or use long pieces of tape. (Don’t use rubber cement; it dries too quickly and won’t be sticky enough.) Get as close to all of the edges of the flattened box as possible– the top edge, base of the box, top flaps, and bottom flaps.
3. Flip your box over, press firmly onto the wrapping paper, lining the side of the box with the edge of the paper as best as you can. If you’re using glue, wait until it dries before moving on. Place books or other heavier items on the edges of the box if the side of the paper seems to be lifting up while drying.

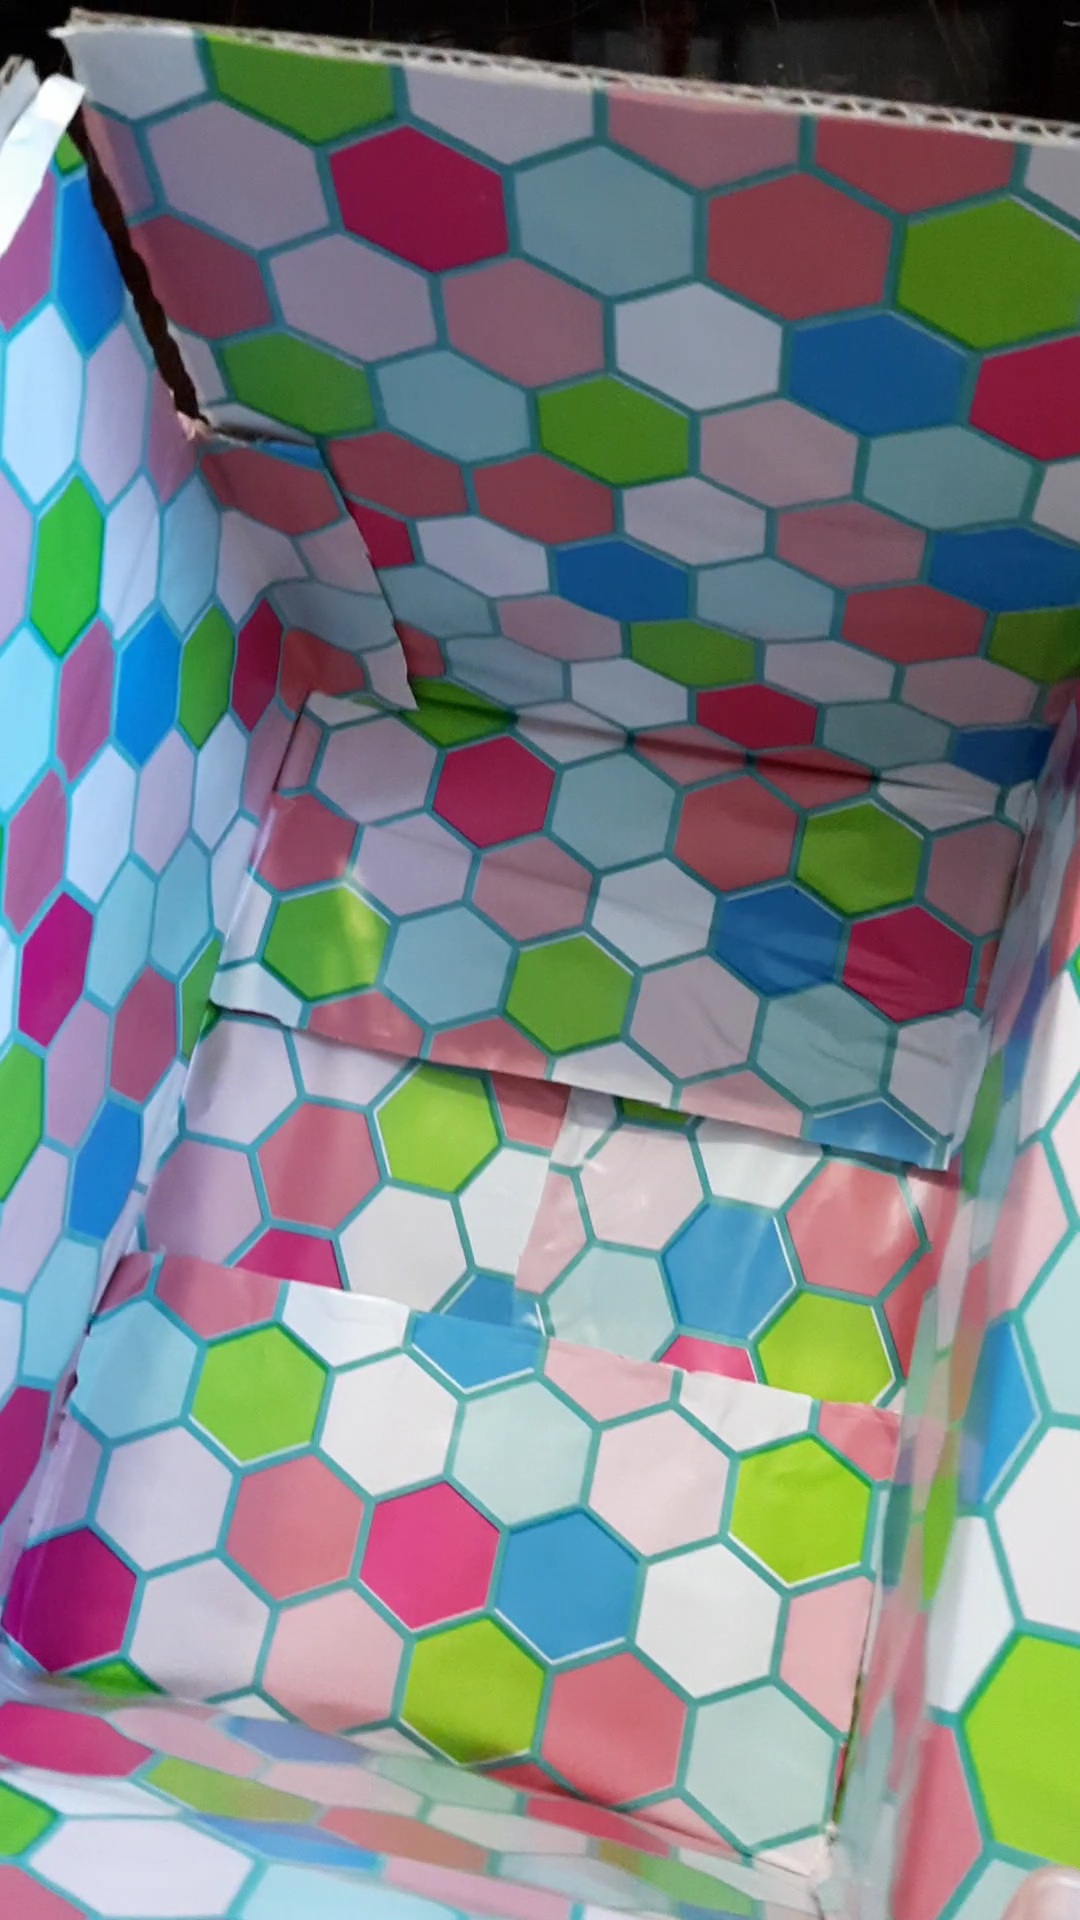
4. Once the box has dried, cut out completely (even between the box flaps) and trim any excess paper. (Use a pen knife or Exacto blade for the really small, tricky parts if you want a very clean cut. Using packing tape, tape, reassemble and tape the box back together. (You’ll naturally crease the paper as you fold it back together– don’t worry! Remember that the box will also be filled with items when it is sent to your recipient. They won’t notice a strange crease.) Make sure to secure the inside tab with glue, and then tape the side on the inside and outside of the box with clear packing tape.


10 Responses
I love this tutorial and can’t wait to use it for birthday/Christmas/and a couple of coffee and sport themed boxes I have wrapping paper for! I tried to find Halloween wrapping paper I liked, but couldn’t. Do you still take the box apart and use Elmer’s glue for scrapbook paper? I tried using double sided tape tonight for my first care package, leaving the box intact and cutting the paper down, but don’t love the way it is looking/popping up and am wondering what adhesive works best. Would the rubber cement be alright since you are going section by section? Thank you for all the wonderful ideas and tips!!
Thanks, Hayley! I don’t take the box apart when I do the scrapbook paper. The 12×12 stuff is the perfect size for the large USPS boxes. :-) And rubber cement does work for those, since you’re gluing one side at a time instead of the entire thing. Please send me pictures of your completed box– I’d love to feature it! :-)
Thank you for the reply! Rubber cement worked great – and the first care package was a success! I just posted some pictures of it :)
Good to know! Yay! :-)
Love this!! Doing this for my Airman’s birthday. Thanks for the tutorial.