

You could say that I’m a little “experienced” in sending care packages across continents, oceans and literally around the world. Three years in Japan plus 10 years as a military spouse, including deployments, has taught me a few important lessons in packing and shipping.
I’m proud to say that in a decade, with hundreds of items shipped, I have achieved a 90% success rate in preventing broken things. Sure, a few little things have arrived damaged slightly. But they weren’t anything valuable or that wrecked other items.
Select your gifts
First, decide what it is you want to send OCONUS. As you shop and collect, be sure to consult with the USPS list of items you cannot send in the mail.
There are some things that you can never, ever send. But then there are other items that you can send, but must understand that they might not get there in one piece.
Personally, I stay away from things that are:
- super perishable and need to be delivered ASAP
- super breakable
- super valuable, either sentimental value or actual price/cost
- messy
- spillable
But what happens when you might need to ship items that fall into my no-go categories or that are “shipper beware” according to USPS?
Pick your package
What you are sending will determine the package packaging you select. However, no matter what I send, my go-to packaging is the USPS pre-paid mailers. You’re going to want to look for the ones that are flat rate and not the pay by weight.
There are options to fit all your needs: boxes in all sizes, padded envelopes and plan but really big envelopes.
For breakable or possibly fragile items, go with a box. The sturdy sides will help to contain your gifts and prevent a ton of shifting or damage in transit. Try to avoid going too big and err on the side of a smidge small. Boxes that are too large will either require a ton of filler/padding or more items, which costs more money.
For soft items or things that are sturdy, but without hard edges, consider using a variation of envelope. Either padded or plan could work. Again, keep the volume of your total gift pile in mind as you select your envelope. Going too big will also require more padding to keep things secure.
Wrap and stuff
Over the years, my shipping savior has been layers of wrapping materials.
Now, not everything needs to be wrapped securely. If your item is already inside of a box/bag/container that seems pretty secure or designed for it, leave it be.
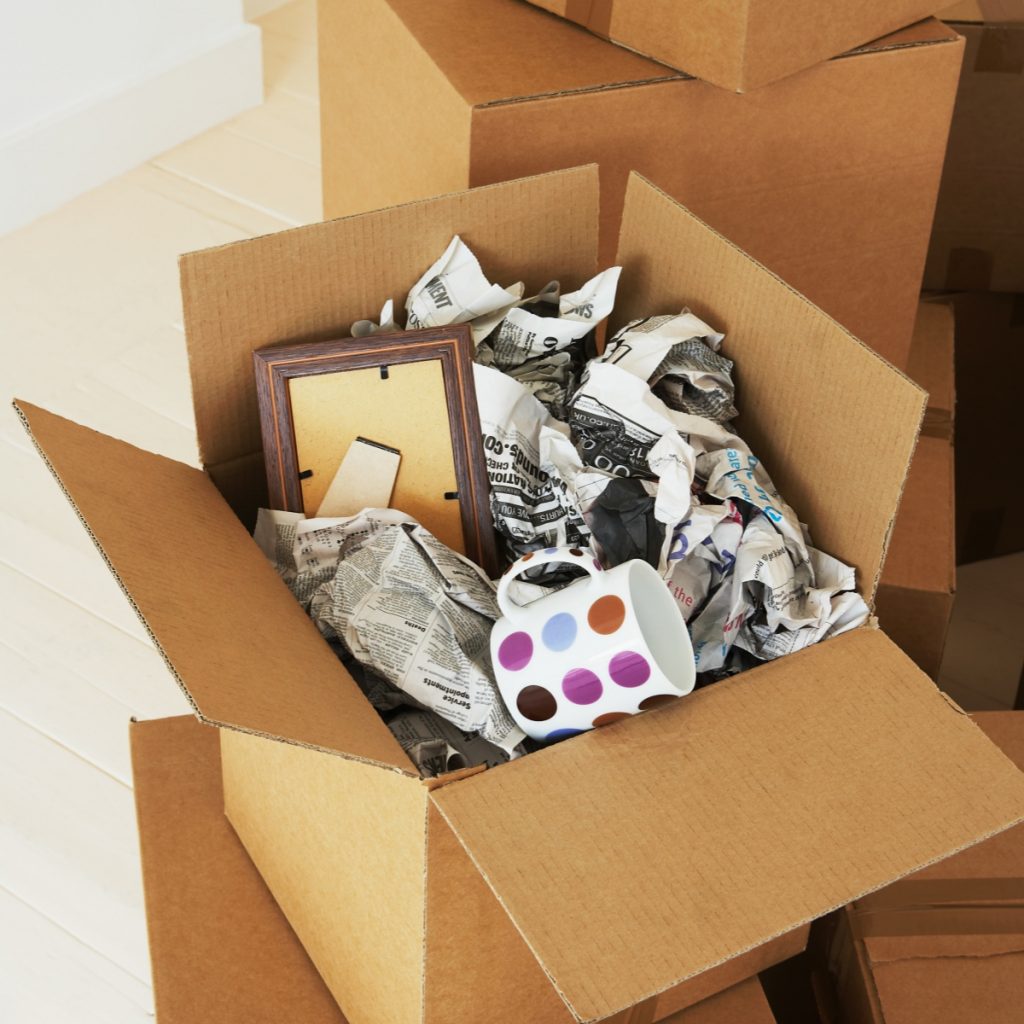
- Glass/porcelain/breakables: wrap these items individually in layers of newspaper, bubble wrap or (honestly) any fabric items you’re also shipping; think: socks, shirts, bandanas, scarves, etc.
- Food: double layer it in Ziploc bags
- Spillables, liquids: double Ziploc bag
Your main goal is to prevent breakable things from breaking and liquids from getting all over everything. Food smells should be contained and not contaminate anything else in the package.
After you have things wrapped securely, it’s time to start packing.
If you are using an envelope-style container, chances are that you don’t have anything too fragile inside. Still, pack this with the most sturdy, shock-absorbing items on the top, bottom and sides. Doing this will basically create a cushion around the stuff in the middle, which will be your most delicate items.
When using a box, follow this same packing strategy with some adjustments. Sort your items by size and flexibility. Packing will be sort of like Tetris, getting everything to fit just right!
Around the sides and bottom, place things that are shock-absorbing and flat-ish. Think boxes of tea, socks, etc. In the middle, you’re going to place your most fragile items. Start by placing the biggest and more inflexible or oddly shaped item(s). Then work around that with the smaller things that can be kind of squished into nooks or crannies. On top, place some more flat, shock-absorbing and non-breakable items. This is a good spot for books, socks, shirts and cards.
Invest in lots of tape
Your package will be going through several stages of shipping, so closing it securely is essential.
Start by taping the top flaps of the box. Close all 4 flaps and then tape, with clear packing tape, right over the seam. Follow that up with a second layer of tape, extending it down the sides of the box from the top seam.
Put 1-2 pieces of tape across the box, perpendicular to the seam you just taped. Put tape on both ends of the seam, wrapping it around the sides to really secure things.
Consider running a few pieces of tape on the bottom side of the box. Place them exactly as you did on the top part of the box. If you’re going a longer distance or have very fragile things, you could also consider taping all the corners of the box.
For envelopes, you should still be using tape– even if it comes with a self-adhesive closure! Use that self-stick option, then cover it over with 1-2 layers of packing tape. You might also want to wrap a layer or two of tape around the middle of the envelope as well as on the bottom. You know, just in case.
Addressing your care package
Okay, so unlike sending mail within the US, this gift will require a form.
Pro tip: always grab the short custom form. It’s exactly the same as the bigger one, but so much smaller and requires less details.
On the actual package, write the full name and address of the recipient. Make sure that you are formatting the address according to the style of the country you are sending it. Your recipient can help you here!
For APO/FPO addresses, do this:
Line 1: First Name Last Name
Line 2: Box Number
Line 3: FPO/APO, (region code), Zip Code
My address when I loved in Japan looked like this (and obviously this isn’t my real one):
Line 1: Meg Flanagan
Line 2: Box 1234
Line 3: FPO, AP 93677
You are going to write the address onto the customs form and the actual package. After you write the address on the package, tape over it with clear packing tape. This will help in case your box or envelope gets wet in shipping.
Pro tip: every region of US military operations, like sending things to Afghanistan or a person stationed at a military base in Japan, has it’s own two letter code. Japan, Korea and the general Asia/Pacific region is AP. Confirm your recipients region code before you send anything!
Pay and be on your way
Last, walk your package into the post office near you and send it off. If you’ve used a flat-rate package option, you pay that cost and that’s it. If you are using another pay-by-weight option, like recycling a box or using a different USPS box, the clerk will weigh your package and tell you the cost.
For shipping a lot of light but bulky stuff, using a pay-by-weight option could be cheaper. But generally, using the flat-rate boxes and envelopes will be cheaper and easier.
Once you’ve paid, the clerk will hand you your receipt and the “extra” pages from the customs form(s). Keep these. The receipt has a tracking number on it so you can watch your lovely gift make it’s way around the world!
Looking For More Care Package Ideas? Try These:
- 40 Ways to Save Money on Care Packages
- The Gigantic List of Free Care Packages for Deployed Service Members
- Here’s What Troops Really Want in a Care Package
Meg Flanagan is a teacher, blogger and military spouse. She owns Meg Flanagan Education Solutions, an education advocacy service dedicated to serving families on the K-12 journey. You can find Meg on Facebook. Meg is also available as a freelance writer and personal education advocate!